UV Mapping;
Probably the one stage I
dislike the most so far in animating would the UV mapping stage. Essentially UV
mapping is the process in 3D modelling of projecting a 2D image onto a 3D
model’s surface which leads to texture mapping. The way that UV mapping works
is that it creates a texture map around your 3D model, best shown with a cube,
as seen in the image below.

A representation of the UV mapping of a cube 2008.
However it is still quite a
tedious process to get through and can make or break the texture’s positioning
on the model.
Texturing and Shaders;
Texturing and the usage of
shaders is the next step in 3D animation after the UV mapping. What this stage
consists of is the boring bland default grey looking model, known as the
default shader, and adding a new shading material to the 3D model, as stated by
Boudon (N.A.) it “gives the artists the ability to control things like colour,
reflectivity, shininess, and much more.” Thus what was once a 3D model with a
solid grey colour can be transformed into a 3D model that looks very realistic
or might end up looking cartoon like with the colours and materials applied to it,
as seen in the images below.
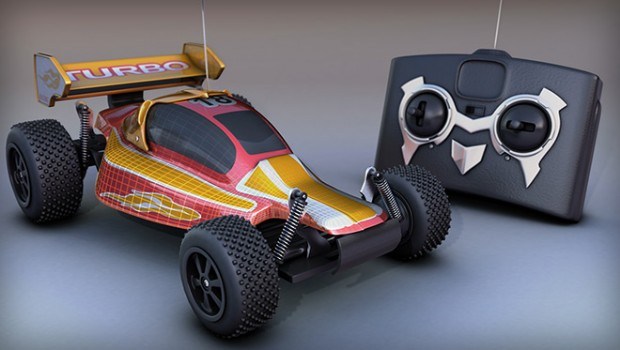
Toy Race Car Textured (N.A.).

Female Model (2014).
Rigging;
Rigging is either one of the
most frustrating or enjoyable parts of animating, it really depends if you like
it or not. Essentially rigging is the phase where you create a skeleton, the
joints and the control nodes for your 3D model. You definitely do not want to
animate your 3D model whilst not having a skeleton for it, otherwise you’ll end
up animating the mesh, and that is one thing you want to absolutely avoid with
animating. So what exactly does the skeleton, the joints and these control
nodes allow you to do? Simple, it allows you to move body parts and create
facial expressions so that your 3D model can actually move and thus come to life,
however you must still think about whether or not the body parts should bend
like real body parts, for example the arm bending at the elbow joint, or if
it’s going to be like one of those wacky cartoon character’s arms where it can
extend beyond that of a normal human being. An example of a rig and skeleton is
seen in the image below.

Rig & Nurb
(2010).
Animation;
Animation, the phase where
your rigged assets are animated using controls to match the desired shot and
where you can see all the previous steps come together. Essentially animating
can mean anything from complex character movements that you see in the latest
films and video games to the movements of something mechanical, let’s say for
example an engine. To be able to make an animation an animator will use a
timeline and then set movement in the frames that then play back as an
animation, the difference essentially between that of a 3D animation and that
of a 2D animation is not a lot since they use the same concept of flip book
animations. However as Boudon (N.A.) states; “except instead of creating
a new pose on each sheet of paper, 3D animators create poses on a series of
still images that are referred to as frames”. It is an animators job to make
the 3D characters and objects come to life.
References:
Boice, C. (2014). Female Model [Image]. Retrieved from http://calvinboice.tumblr.com/post/85655594777/this-character-was-modeled-in-zbrush-and
Boudon, G. (N.A.). Understanding a 3D Production Pipeline - Learning The
Basics. [Web log post]. Retrieved from http://blog.digitaltutors.com/understanding-a-3d-production-pipeline-learning-the-basics/
Boudon, G. (N.A.). Toy Race Car Textured [Image]. Retrieved
from http://i2.wp.com/blog.digitaltutors.com/wp-content/uploads/2013/10/1151-620x350.jpg
Jenson, D. (2010). Rig & Nurb Model [Image]. Retrieved
from http://www.derekjenson.com/3d-blog/archives/02-2010
Zephyris (2008). A representation of the UV
mapping of a cube [Image]. Retrieved from https://en.wikipedia.org/wiki/UV_mapping#/media/File:Cube_Representative_UV_Unwrapping.png


